by Dan Duda
Requirements
- Python 3.7
- PyCharm Community (optional)
- Basic Python knowledge
Introduction
I wanted to come up with a project I could work on with my son that would teach a lot of programming fundamentals and also be fun. The idea of a maze hit me one day. I did some searching and came across a cool little algorithm called the Recursive Back-Tracker Algorithm. I’ve used PyGame before and decided to give it a go. PyGame is a light-weight module available for Python that lets you create 2D and 3D games. I like that you can do a lot with very little code and that it doesn’t get in the way of teaching programming concpets. In this blog tutorial series we will look at maze generation using the Recursive Back-Tracker Algorithm as well as concepts such as stacks, bit-wise logic, enumerations, and classes.
The finished game will look like this:
Part 1 will focus on getting our environment setup and running a simple PyGame script. I’ll assume you have a basic understanding of Python including lists, tuples, and dictionaries.
Configuring our development environment
I’ll be using the free PyCharm IDE to write my code. You can download it here. Any code or text editor should work though. It is assumed you have python installed on your machine. I will be using Python 3.7 virtual environment although it should work with any 3.x version of Python. The PyGame package will also need to be installed. You can use pip install to install the PyGame packages or use PyCharm as I will show below.
Creating a new project
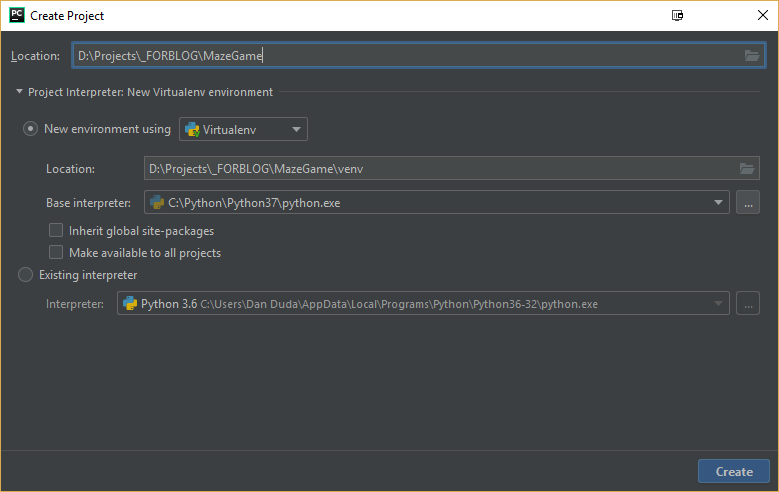
In the PyCharm File menu choose “New Project”. A new project dialog will appear. Choose a new folder for the project, I called mine “MazeGame” and then expand the “Project Interpreter” section. Make sure the “New environment using” radio button is selected as well as “Virtualenv” from the dropdown. For the “Base interpreter” I chose my Python 3.7 install. Then click “Create”.
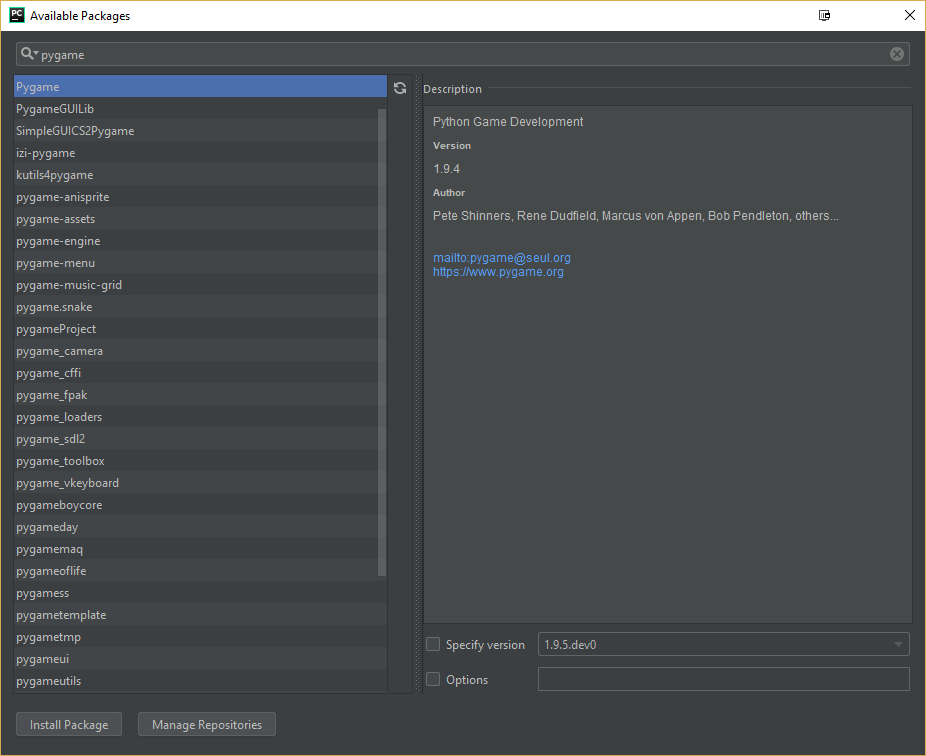
Next go to the File menu and choose “Settings…”. On the settings dialog select “Project:MazeGame”, make sure it’s expanded and select “Project Interpreter” underneath. Click the “+” next to the packages list to add a package.

Type in “pygame” in the package search bar and then select “PyGame” from the results and click “Install Package”. Close the dialog.
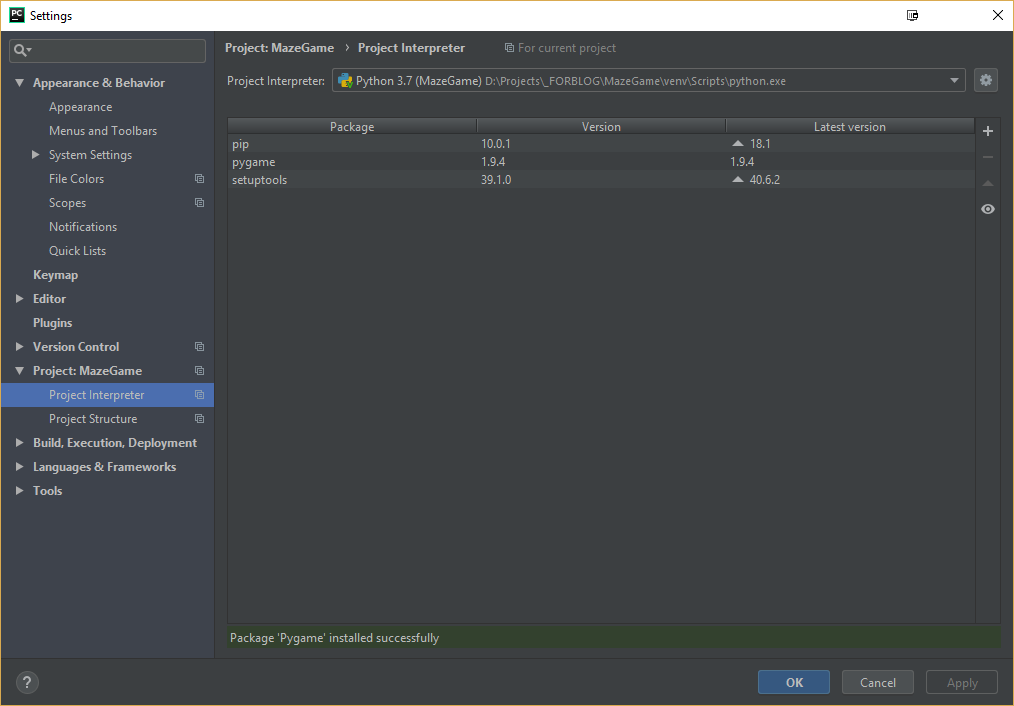
After it installs you should be back on the settings dialog and see that the PyGame package is listed under the packages. Click “OK” to close the dialog.
A simple PyGame script
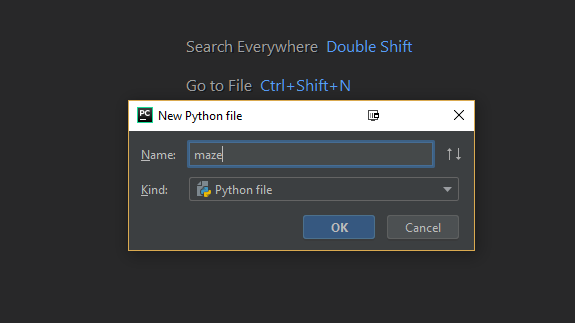
Right-click on the project name in the list on the left and choose “New->Python File”. Enter a name for the script. I’m calling mine, “maze”.

We’ll start by building the simplest PyGame script that just opens a window with a title.
In the editor enter the following code.
1 | import pygame as pg |
From the “Run” menu choose “Run ‘maze’” and it should display an empty window like this.
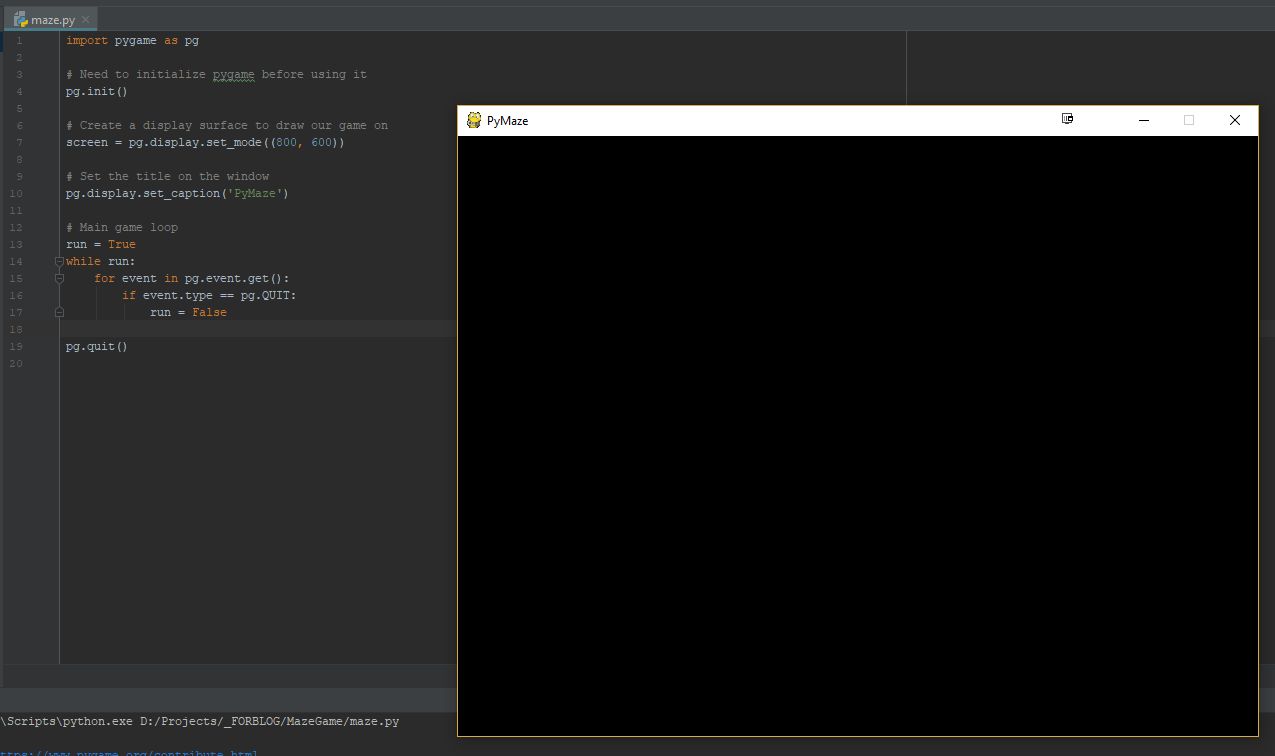
On line 1 we import the PyGame package and give it an alias of “pg”. Since we’ll eventually be calling a lot of PyGame methods this makes it easier so we don’t have to type out “pygame” each time. Line 4 initializes the PyGame modules. This needs to be called before we use PyGame. Line 7 creates a surface that we can display our content on. In this case we’re making a display area of 800 X 600 pixels. Line 10 sets the title that is displayed on the window in the top left corner. And finally Lines 13-17 set up our main game loop. This is where we will check for events such as user input as well as updating our display.