Big Space Rocks Tutorial
Part 1
Welcome to my first Godot Tutorial. My name is Dan and I've been a software developer for almost 30 years. I enjoy making games and love the Godot game engine and GDScript. In this tutorial I'll be making a simple top-down 2D space shooter type game inspired by the classid Asteroids game.
It will look something like this when completed. You can also play the game here.

I am using the latest (at time of creating this tutorial) version 3.3.2 of Godot. I will assume you have some experience using Godot and understand the concept of Scenes and Nodes. If not check out some of the great tutorials by GDQuest here
Project Setup
Let's start by creating a new project. Type in a name, choose a folder, and click "Create Folder". Select "OpenGL ES 2.0" for compatibility with web, then click "Create & Edit".

If all goes well you should see the following screen.

There will be a player ship that can move around the screen and shoot lasers at asteroids. For controls we will use the arrow keys for rotating and thrusting, and the space bar to shoot.
Let's first setup our project. Go to the "Project" menu and select "Project Settings...". On the "General" tab, scroll down to the "Display" section and select "Window". Set our "Width" and "Height" to be 1024 by 768. Also uncheck "Resizable".

Scroll down to the bottom of the properties list to the "Stretch" section and change "Mode" to "2d" and "Aspect" to "keep".

While we're in the project settings we can go ahead and setup our actions. Change to the "Input Map" tab. We will add 4 actions:
- turn_left
- turn_right
- thrust
- fire
Next to "Action" at the top type in "turn_left" and then press "Enter" or click "Add".

Then do the same for the other 3 actions. You should then see the 4 new actions at the bottom of the list.

Now click the "+" next to the "turn_left" action we added and select "Key". When the dialog appears press the Left Arrow key then click "Ok". Do the same for the other 3 actions using the Right Arrow for "turn_right", Up Arrow for "thrust", and Space Bar for "fire".


When finished our actions should look like this

Press "Close" on the "Project Settings" dialog.
Player Scene
In our first scene we'll create the player and enable it to move around. We only need to deal with simple collision detection so we'll make our player an Area2D. Back in the main Godot interface click on "Other Node" and select "Area2D" and then click "Create".


Should now have this.

Rename the node by clicking on it and changing it to "Player"

Press CTRL+S to save the scene. It should default the name to "Player.tscn". Click "Save".
There should be a little yellow exclamation icon next to our player node. This just means that the node requires some child nodes to work properly. Since it's a Area2D we need to add a node to display the image of our player, a spaceship. For this we could use a Sprite node but I want to use a AnimatedSprite node for reasons I'll explain soon. We'll also need a CollisionShape2D node so that it know how to collide with otehr objects. With the "Player" node selected, press CTRL-A or click on the "+" just above it to add a child node. Search for "AnimatedSprite" and click "Create".


We need to give the animated sprite images to display. Download the following 2 assets by right-clicking on each and choosing "Save image as".


In your file manager go to the folder that you originally created for the project. Create a subfolder named "img" and copy the 2 space ship images into that folder.

Back in Godot select the "AnimatedSprite" node and then over in the properties inspector on the right side of the screen, click on the dropdown next to "Frames" and select "New SpriteFrames".

Then click on the "SpriteFrames" label that appears next to "Frames".

This will open the "Animations" pane at the bottom of the screen.

On the left side of the Animations pane we see we start with a "default" animation. This is all we need. Expand the "img" folder in the "FileSystem" pane and drag them to the "Animation Frames" area. It should look like this.

We will ignore most of the properties for the AnimatedSprite. This is because we are not actually going to use it as an animated sprite. I find it useful to use the AnimatedSprite node in cases where I want to change the image for an object based on different states as one node instead of having many individual sprite nodes. So in this scenario we will have the space ship in normal mode and the space ship in thrusting mode. By just changing the frame of the AnimatedSprite node we can easily switch between the two images.
This would also be a good time to press CTRL-S to save our scene. It's a good habit to save often.
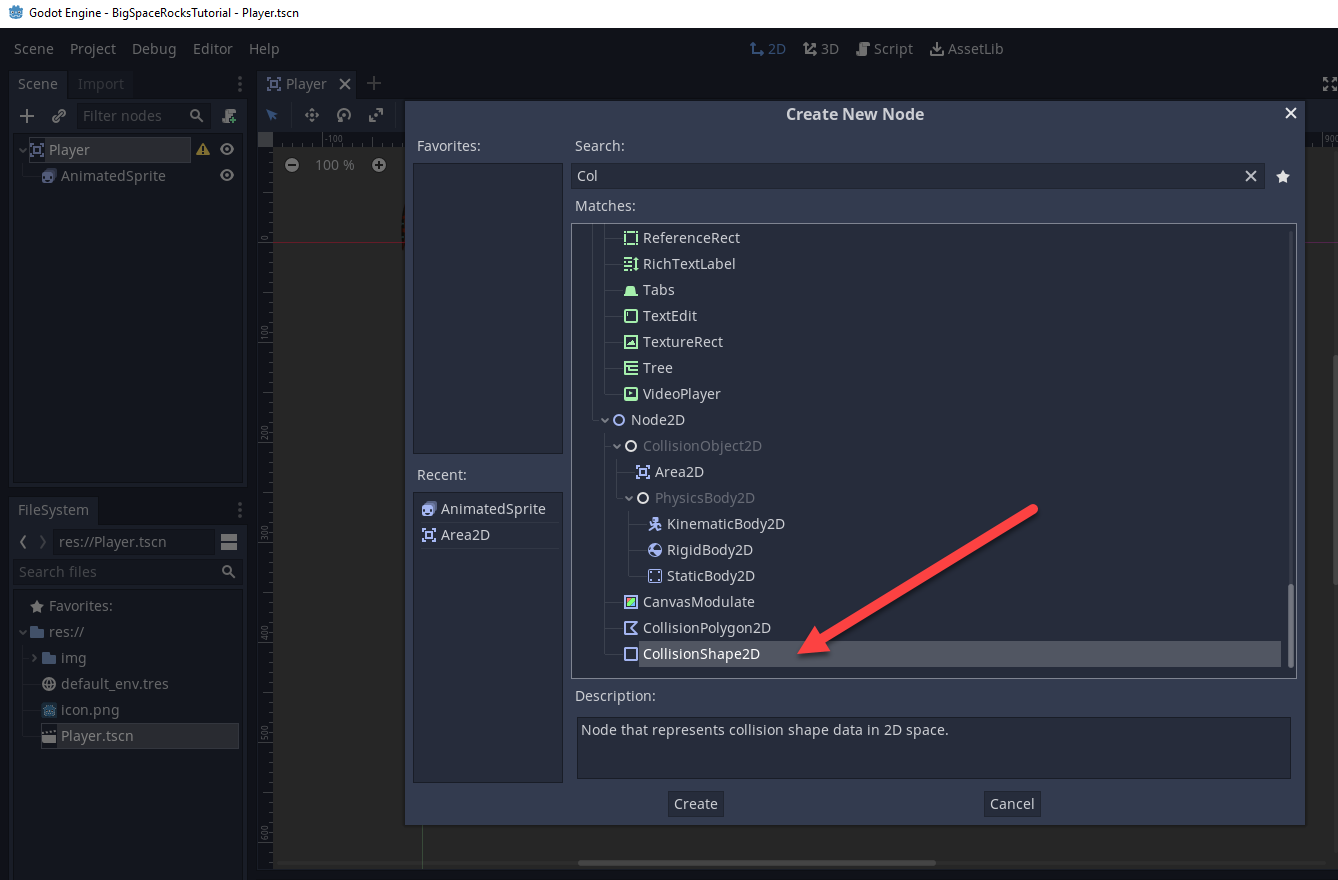
We still need to add the collision node so with the "Player" node selected press CTRL-A or click on the "+" to add a node and search for "CollisionShape2D". Select it and click "Create".

And with the "CollisionShape2D" node selected in our scene go to the "Inspector" and click on the drop down next to "Shape". Choose "New CapsuleShape2D".

Now in the scene view you should see a capsule shape over our spaceship sprite. Zoom in to see better if needed. Make sure the "CollisionShape2D" node is selected and use the two points on the top and side of the capsule shape to size it to be about the size of the spaceship sprite. You can also click and drag the shape to move it around. It should resemble the following.

Save the scene.
In the next part we'll start scripting for motion of our spaceship.